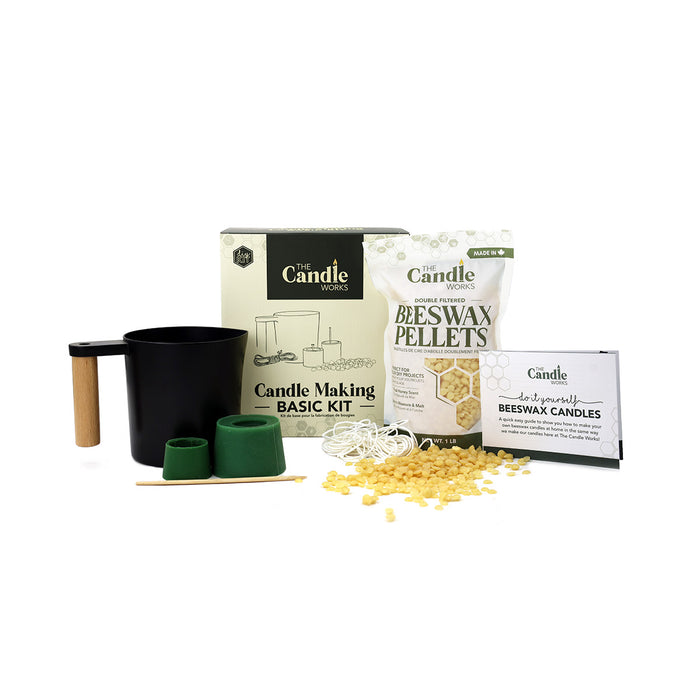
The Candle Works | Candle Making Basic Kit
Candle Making Starter Kit Contents:
1.5 lb wax
1 Wax Melting Pot
1 Votive Silicone Mold
5 Plastic Tea Light Cups
1 Hexagon Glass
5 Wicks in Tabs
5 Wick Tabs
5 ft 2/0 wick
5 mini clothes pins
1 small dowel
Instructions:
Using a double boiler place Wax Melting Pot with beeswax into pot on medium low heat. Use caution not to melt the wax at too high temperature. Never leave the wax unattended on the stove. Let wax melt completely.
While wax is melting, prepare your candle molds/containers by putting wicks/wick tab holders in the center of each container. Be sure the wicks are centered. Use a small about of wax on the bottom of the wick tab holders to ensure it stays in place and doesn’t float when you pour the wax.
For the silicone molds, Thread the wick through the hole at the bottom. Be sure to leave an inch or so, as this is actually the top of your candle. Wrap the other end of the wick around the dowel, and clip into place with the clothes pin. Be sure the wick is taught and centered. Once the wax is melted, carefully take your wax melting pot out of the double boiler, and carefully pour wax into your molds/containers. Ensure everything is on a level surface. Let cool completely.
Once cool, carefully remove from the silicone molds by pushing from the bottom. Be sure the wick comes out with your candle. If not completely cool, the wick may be pulled out if you don’t hold onto it while removing it from the mold.
Trim the wick on the bottom and then gently even out the bottom of your candles by heating them on a pan (use aluminum foil if it’s not a dedicated wax pan). Don’t leave on heat too long, place on a hard surface to even out the bottom. Trim the top of your wick, being sure not to cut it too short.
My grandma would always tell me that an unburned candle is bad luck, so be sure to light your wick and burn it for a moment and blow it out for good luck.
Enjoy!


